Chapter 2 - Iterating through data sets and customizing display for Feature Blocks
This Chapter will Cover:
- Anatomy of for loops
- Scoping of variables within a for loop
- Adding Social Tags
- Using and transforming Output Markup with Filters.
Chapter 3 - Iterating through data sets and customizing display for Feature Blocks
In Chapters 1 and 2 we learned about using SML Tag Markup and Output Markup to configure basic tags and variables. In this exercise we’ll take those same tools and configure one of SML’s configurable applications. RSS Feeds are one of the most popular ways to syndicate content from one website to another and using our rss_feed feature block you can incorporate them into your SML Tab as well.
Feature blocks are like tags but with a few key differences. Firstly, they have explicit end tags. Just like a <div> needs an </div> to display properly in HTML, a {% rss_feed %} needs an {% endrss_feed %} to function in SML.
Feature Blocks also have their own configuration that is managed separately - for example, the rss_feed feature has a setting for the feed's URL(s). Most feature blocks share a backend with one of the Involver standalone applications. In this case, the rss_feed feature block is Involver RSS application.
In your SML application, paste in the following code:
{% rss_feed %}
{% endrss_feed %}
Click "Save Changes"
And now we configure
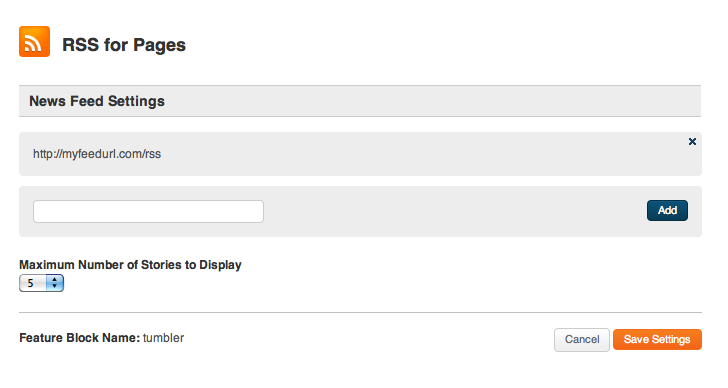
Adding sources to an rss_feed block is easy, all you need to do is
1. Click configure
2. Paste in the source url and click “add” for each source you want to add
3. Click “Save Settings” to save and return to the editor window.
You’ll notice that when we refresh the page we have a fully functional display in place. This default configuration is the same as you’d get using the standalone app. To over-ride this default display, all we need to to is drop some configuration code into the rss_feed between the start and end tags. Let’s go ahead and do that now.
{% rss_feed name:"my_feed"%}
     <h2>Latest deals from <a href="{{ rss_feed.url }}">DealNews.com Daily Feed</a></h2>

     {% for feed_item in parent.content_items %}
          <div>
               <h4><a href="{{ feed_item.origin_url }}">{{ feed_item.title}}</a></h4>
               <p>{{ feed_item.summary_text_body | strip_html | truncate: 140 }}</p>
          </div>
     {% endfor %}
{% endrss_feed %}
This example brings in several new moving parts, let’s take them apart and see what they do.
Introducing the for loop
The first thing to focus on here is the for loop. for allows you to iterate through a set of items (such as the posts in a feed) and apply style and configuration options to each of them. The syntax is as follows:
{% for some_object in source_of_set.set_of_objects %}
     // configuration code goes here
{% endfor %}
We can take “for feed_item in parent.content_items” and read it literally as “for each content item in the set of items supplied by the containing feature”.
Inserting Attribute Variables within for loops using Output Markup
In this case we’re using the variable feed_item as a placeholder for “each item”. You create the variable by calling it and you could replace feed_item in our example with any word or string of words you want and the code would still work, as long as you called it consistently in your code. In our example feed_item.title outputs the titles of the feed items. If we change
{% for feed_item in parent.content_items %}
to instead be
{% for item in parent.content_items %}
we also have to change {{ feed_item.title }} to be {{ item.title }}. As long as the variable declared in the for loop and called in the Output Markup match, the code will work. We can insert any of the attributes specified on the feed_item page in the docs for each item in our loop. We simply build out our html template for each item, use Output Markup to configure what content will be inserted where, and wrap it in the for loop that says where the content will be pulled from.
Adding Social tags
We can also add Social Tags like facebook_like by simply dropping them into the loop and attaching them to our variable.
{% rss_feed name:"my_feed" %}
     <h2>Latest deals from <a href="{{ rss_feed.url }}">DealNews.com Daily Feed</a></h2>

     {% for item in parent.content_items %}
          <div>
               <h3><a href="{{ item.origin_url }}">{{ item.title}}</a></h3>
               <p>{{ item.summary_text_body | strip_html | truncate: 140 }}<br/>
               <a href="{{ item.origin_url }}">Read More</a></p>
          </div>

          {% facebook_like item send:true %}
     {% endfor %}
{% endrss_feed %}
Save changes and you’ll see the feed now shows shiny new like and send buttons for each item. You can add Social Tags that add “Like” and “Send” buttons as well as functionality like voting and sharing to any content item on any feature block in SML. All you need to do is drop in the tag and assign it to the appropriate content item by setting the variable from your ‘for’ loop.